Defining and publishing content
Defining and publishing content for your website happens from RiSE > Page Builder > Manage content.
Do the following to define and create content records:
- Go to RiSE > Page Builder > Manage content.
- Select the content folder in which you want to create the content record. Do one of the following:
- Select New > Website Content to create a new content record.
- Click Edit to modify an existing content record.
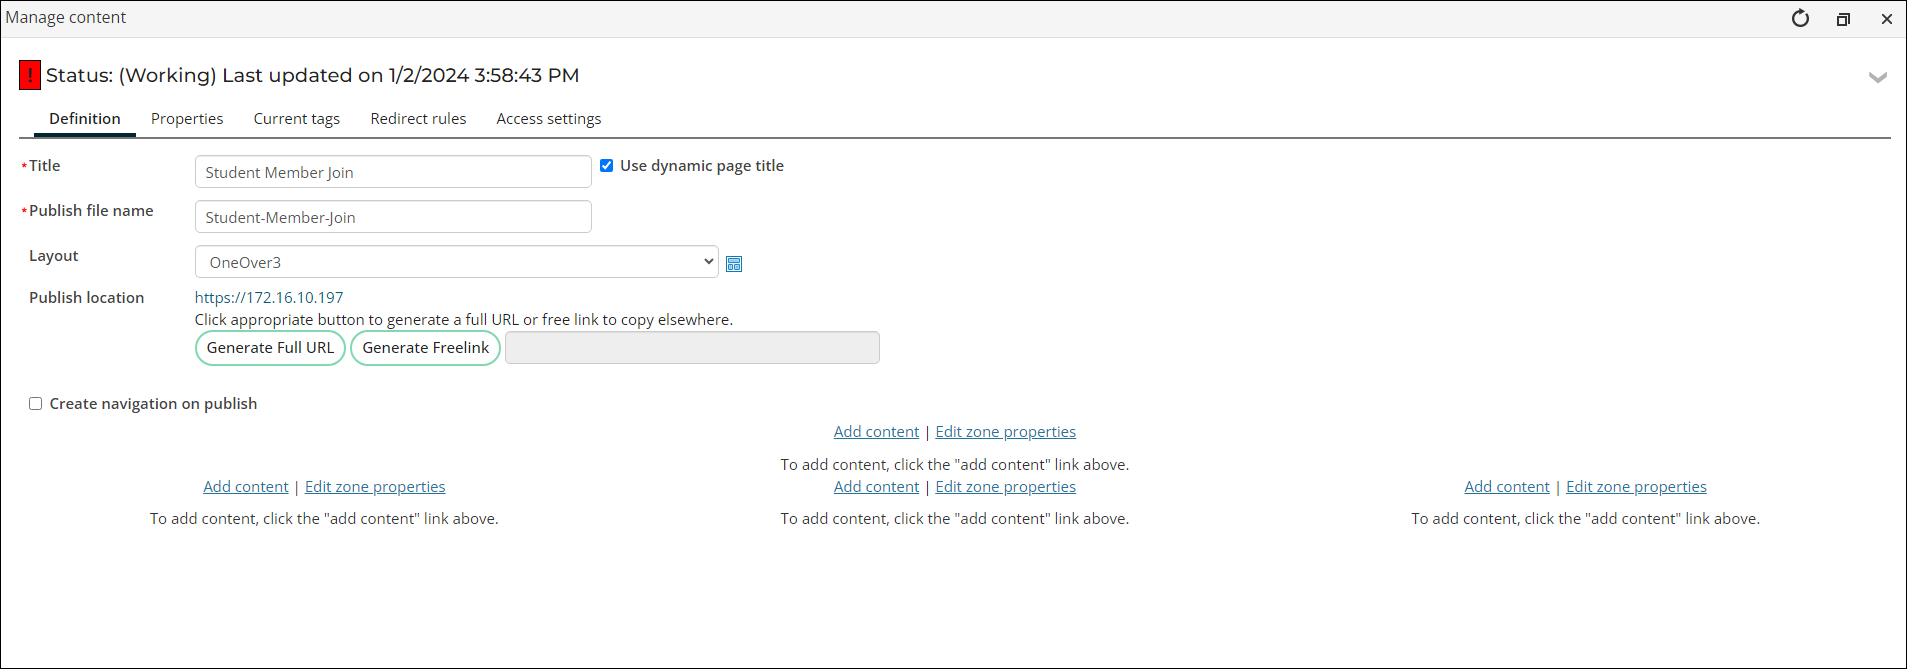
- Enter a Title for the content record. If you would like to include the title of a dynamic content item with the title of your content record, select the Use dynamic page title checkbox.
- Enter a Publish file name for the content record.
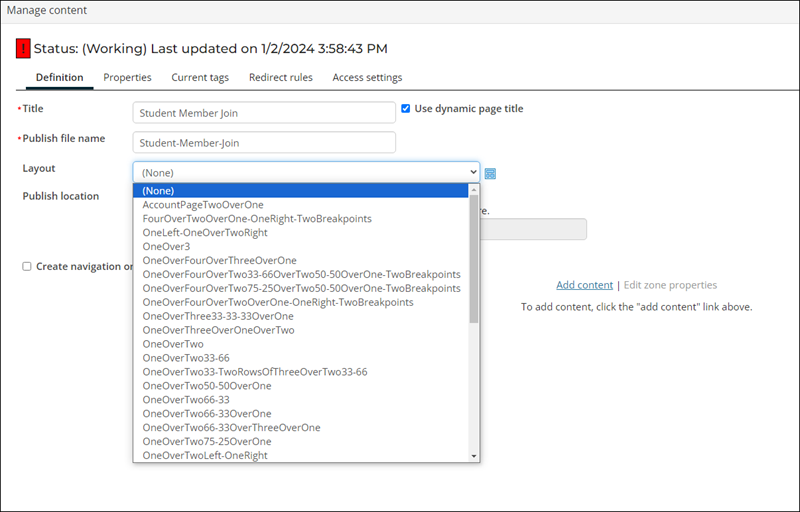
- Select a layout in the Layout drop-down list.
-
(optional) If you want to create a navigation item for this content record, select Create navigation on publish to select the location in a web page sitemap where the content record will be published:
- Enter a name for the new navigation item in the Navigation link text field.
- Click select to choose the Navigation location where this content record is published.
When the content record is published, the Navigation Link Text and the Breadcrumb Name values on the navigation item match the values entered in the Navigation link text field on the content record.
Note: The Create navigation on publish option is displayed only if the logged-in user is one of the following:
- A System Administrator.
- A member of a content authority group with Navigation Creator permission.
The Navigation Folder Name value on the navigation item matches the value entered in the Navigation link text field on the content record, where spaces and special characters are replaced with underscores.
The Content or URL to Link to field is set to the content record being created, and any Access Settings on the content record being created will migrate forward for the navigation item.
Once the new content record is published, the Create navigation on publish option is hidden.
If the content record does not publish right away, then the navigation item will not be available until the sitemap is rebuilt.
Note: If you are creating content in the same site to which you're adding a navigation item, you will need to refresh the page after publishing the content record in order to see the new navigation item.
- Select Add content to add one or more content items to each content item zone.
- Select the content item you want to use. Click OK.
- Configure each content item to define its individual content. Do the following to modify an existing content record:
- Select the content record.
- Click Edit.
- Click Configure for a specific content item.
- Configure the content item.
- Provide the following for each content record:
- Definition
- Properties
- Current Tags
- Access Settings
- If the parent content folder has been enabled for content authoring workflow, you can optionally change the default settings:
- Select the parent folder.
- Click Edit.
- (Workflow Management tab) Modify the content record.
Note: Do not use any special characters in the name of content records or folders.
Note: The content record supplies the name of your web page unless you choose to override with a navigation item title.
Note: If a content record contains several dynamic content items, it is recommended that you turn dynamic page titles off for the entire page in order to limit the title length.
You can also click and drag content items to rearrange them within a content item zone or between different content item zones. It's also possible to copy or move existing content items from one content record to another.
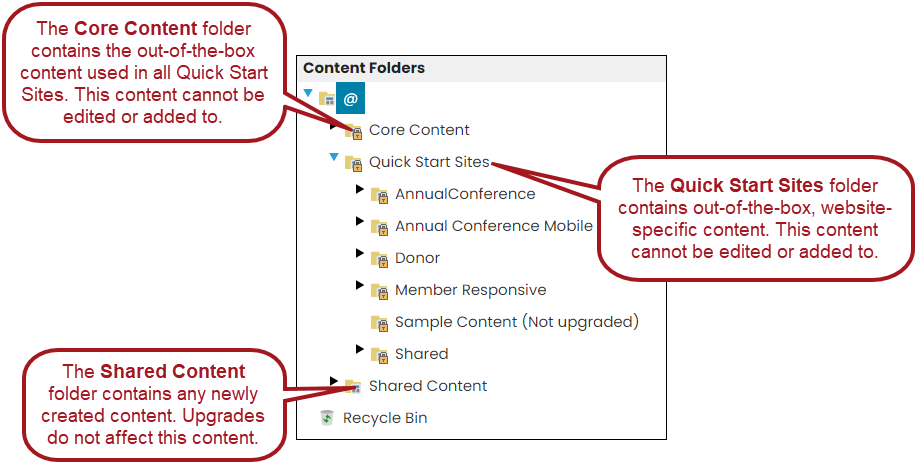
Note: All content records in the Core Content and Quick Start Sites content folders are protected as System content records and cannot be edited or deleted. If you want to update a System content record, create a copy of it, and then edit the copy. Be sure to also update any navigation items or shortcuts that point to that content record.
When you first create a content record, or when you make changes to an existing Published content record, that particular version of the content record is not visible on any iMIS RiSE websites until it is published.
You have two publishing options:
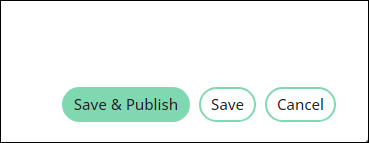
- Save and publish immediately: Before closing the content record, select Save and Publish to make your changes immediately visible on all websites that use the content record.
- Save, then publish later: If you Save the content record without publishing, the content record is marked with a status of Working. To publish the content record, select it and then click Publish in the Document system toolbar.
After publishing your content record, the status changes briefly to PublishPending, and then to Published once it has been fully rendered to an .aspx file on all web servers that host the relevant iMIS RiSE websites.
If status changes don't appear right away, go to Settings > About iMIS, then click Purge System Cache. The publish changes will now appear.
To revise an iMIS RiSE website page by using the Easy Edit feature, log on to the website and click the Easy Edit icon located by default near the Sign Out link on every web page of the website. This enables the Easy Edit mode until you click the Easy Edit icon again to disable it.
When Easy Edit mode is enabled, you will see a variety of different Easy Edit icons appear in different content areas of each web page. Exactly which Easy Edit icons you see will depend on which content authority group permissions and Document system permissions you have on the underlying content records in the rendered web page.
If you have both Content Editor content authority group permissions in at least one content authority group to which you belong and Edit Document system permissions on the specific content record displayed in a content area:
- If the content record is used in the Main Content Area of an interior page, you will see an Easy Edit icon for the entire content record and for each content item in the content record.
- If the content item is included in a System content record, you will see no Easy Edit icons for the content items in the content record, but you will see one Easy Edit icon for the entire content record.
The graphic used for each Easy Edit icon might look different, depending on what type of content items are used in the content record. For example, the Easy Edit icon for a Content Html content item will look different from the Easy Edit icon for a Content Tagged List content item. Moreover, the Easy Edit icon for the entire content record will look different from both of those.
If you are a member of at least one content authority group (regardless of your specific content authority group permissions) and you do not have Edit Document system permissions on the specific content record displayed in a content area, then if the content record is used in the Main Content Area of an interior page, you will see no Easy Edit icons for each content item in the content record, but you will see one Easy Edit icon for the entire content record.
In all cases where you can see at least one Easy Edit icon, you can hover your mouse pointer over an Easy Edit icon to see the name of its associated content item or content record.
The action that happens when you click on any of these Easy Edit icons depends on whether you have Edit Document system permissions to the underlying content records:
- If you have Edit permissions on the content record, you can edit the content item or content record directly:
- Click the Easy Edit icon to open an editor that is similar to what you see in Page Builder.
- Click Save and Publish, or click Save As if you have Edit permissions on the system content record.
- Use your browser's Refresh button to display the changes that you have made to the web page.
- If you do not have Edit permissions on the content record, you cannot edit the associated content record. Instead, the system displays a form that you can use to enter a content change request, which is distributed as follows:
- If the content record is workflow-enabled (a content authority group is assigned to its parent content folder), an email message is sent to the content record's content owner, and a change request entry also appears in the content owner's Page Builder Task list as being assigned specifically to the content owner.
- If the content record is not workflow-enabled or simply has no assigned content owner, a change request entry appears in the Unassigned content change requests section of the Page Builder Task list for every user who has Content Editor permissions in at least one content authority group to which they belong. Even though these users do not receive an email from the system, they can view the contents of your email message by clicking the envelope icon next to the change request in their Page Builder Task list.
Using Easy Edit for a system content record
If you are modifying a system content record, your page will have a lone Easy Edit icon on the bottom of the page. Click this icon to open a modified edit page. Note the presence of a Save As button.
There are two scenarios where you will be asked to use the Save As Easy Edit approach: Shortcuts and Sitemaps.
Do the following to use Easy Edit to modify a system content record through Shortcuts (for example, an event detail, product detail, or account page):
- Click the Easy Edit icon on your web page.
- Make a change to your web page content.
- Click Save As. You are prompted to save your content in the Shared Content folder.
- Click OK.
- Click Save & Publish.
- Go to RiSE > Site Builder > Manage shortcuts.
- Find the shortcut that is currently pointing to the page you edited. Note the values for For Website and Shortcut.
- If the shortcut is for All Sites or your specific website, either edit the content record or create a site-specific content record using the following:
- Select Add shortcut.
- In For websites, select your website.
- In Shortcut, enter the value noted in Step 8.
- In URL or Content record, click select. Select the new content record.
- Click Save.
- Go back to the page you were editing. Note in the URL, the web page is accessing the Shared_Content record. You can edit as normal.
Do the following to use Easy Edit to modify a system content record that is reached through your website’s sitemap (for example, clicking on a navigation link):
- Click the Easy Edit icon on your web page.
- Make a change to your web page content.
- Click OK.
- Click Save As. You are prompted to save your content in the Shared Content folder.
- Click Save & Publish.
- Go to RiSE > Site Builder > Manage Sitemaps.
- Find the sitemap for your website.
- Click the navigation for the page you’ve edited.
- In Content or URL to Link to, click select.
- Find your new content record.
- Click Save.
- Click Publish.
- Click OK.
- Go back to the page you were editing. Note in the URL, the web page is accessing the Shared_Content record. You can edit as normal.
Troubleshooting
To edit a web page's underlying content records or content items by using the Easy Edit feature, you must have Content Editor content authority group permissions in at least one content authority group to which you belong, and you must also have Read and Edit Document system permissions for that content record. Without these permissions, you are instead presented with a form that submits a change request to the Page Builder Task list for all Content Editors defined in the system.